Wednesday, October 27, 2010

But as for me and my house.... Part 4

Alright, I've now taken you through a pictorial overview of the construction phaseexterior of the house and interior of the original house as we have remodeled and added onto our home this year.  This segment will focus on the new and improved kitchen and laundry room. 

Laundry Room:


Cabinets!


2 of the newest members of the family, Whirl and Pool


Kitchen:

Before

Removing Cabinets

Demolition crew


Window that was removed for access to Dining Room

Cabinets being installed

From Dining Room

Island with 2 more new family members, Kitchen and Aid

From Living Room

New gas range


Our temporary table until we purchase bar stools
and Dining Room furniture

Pantry:
The old pantry was torn out and the computer desk (2 pictures above) now sits where the old pantry was.  We cut a new door through the kitchen wall into what used to be the playroom and created the new, spacious pantry which also stores extra kitchen appliances, stock pots and the freezer.  There is room to add a second freezer in the future.


That completes the areas of the house that we are currently using.  Once the hardwood floors are installed, I will update on the remaining addition....Dining Room, Master Bedroom, and Game Room.

But as for me and my house.... Part 3

If you're not up to date,  you can catch up here with Part 1 and Part 2 of our home renovations this year.

Into the basement we go....

With the thunderstorms and tornado warning that we experienced yesterday, we had our first opportunity to use our basement for its intended purpose - a storm shelter.  As you can see, we were very prepared with a flashlight and dustpan, because you never know when you might need a dustpan....  


Although we have officially moved back into our own home, the renovations are not officially complete.  It will still be 2-3 weeks before the hardwood floors are installed in the new part of the house and then that will be followed by finalizing the trim work and paint.  We also gave away many of our hand-me-down furnishings and appliances before we moved out if we were planning on replacing them.  However, many will not be replaced until the house is complete and we have extra spending money once again, so many of the rooms still look bare and incomplete.  Most of my "before" pictures are from several years ago that I found highlighting different rooms of the house because I did not think to specifically take pictures before tearing out sheetrock.

The living room:
We only made minor changes to the living room. We replaced the windows and painted all of the trim white.  For those of you who had previously visited our home, you will notice that the door leading into the old playroom was removed and replaced with pine boards to match the rest of the room.  You can't even tell there used to be a door there!


Before, with door in living room that previously led to playroom


After, door is gone.

All of the doors in the house were old doors from the 1950s, in the brown stain as seen in the picture below, creating a very dark hallway and no contrast between the walls and doors.

Before - front door and closet door

After - front door and closet door

After - down the hallway to bedrooms


Downstairs bedrooms:
These are the three bedrooms that we had in the original house.  We replaced all of the windows that dated back to 1954 and no longer sealed completely, resulting in very drafty rooms.  We also removed all of the sheetrock in order to insulate the walls, which previously had no insulation and we divided the very long closets into 2 separate closets in 2 of the bedrooms.  We replaced all the bedroom and closet doors, which also dated back to the 1950s, many of them with holes knocked through them from the roughness of my father-in-law and his brothers when they were growing up.


Scraping sheetrock mud off hardwood floors in bedrooms

50 year old hardwood floors, vacuumed and moopped


50 year old hardwood floors vacuumed, mopped and waxed


Bedroom "before" with fake paneling, that has since been removed

"Before" - Notice the old windows and wood trim


After - new windows and trim


After - Boys' room


After - Maggie's green room 


Helping Daddy install closet shelves

New, much more "useable" closet space

Tomorrow we'll move to the kitchen and laundry room, two of my favorite rooms, as well as the two rooms that I spend the most time in throughout the day.


Tuesday, October 26, 2010

But as for me and my house.... Part 2

If you missed the first part in this series on the process of adding onto and renovating our home, you can begin here.

Once the basement was framed out, framing out the rest of the house went pretty quickly.

Ready to pour the concrete roof of the basement

Foundation

Crawling in the crawl space

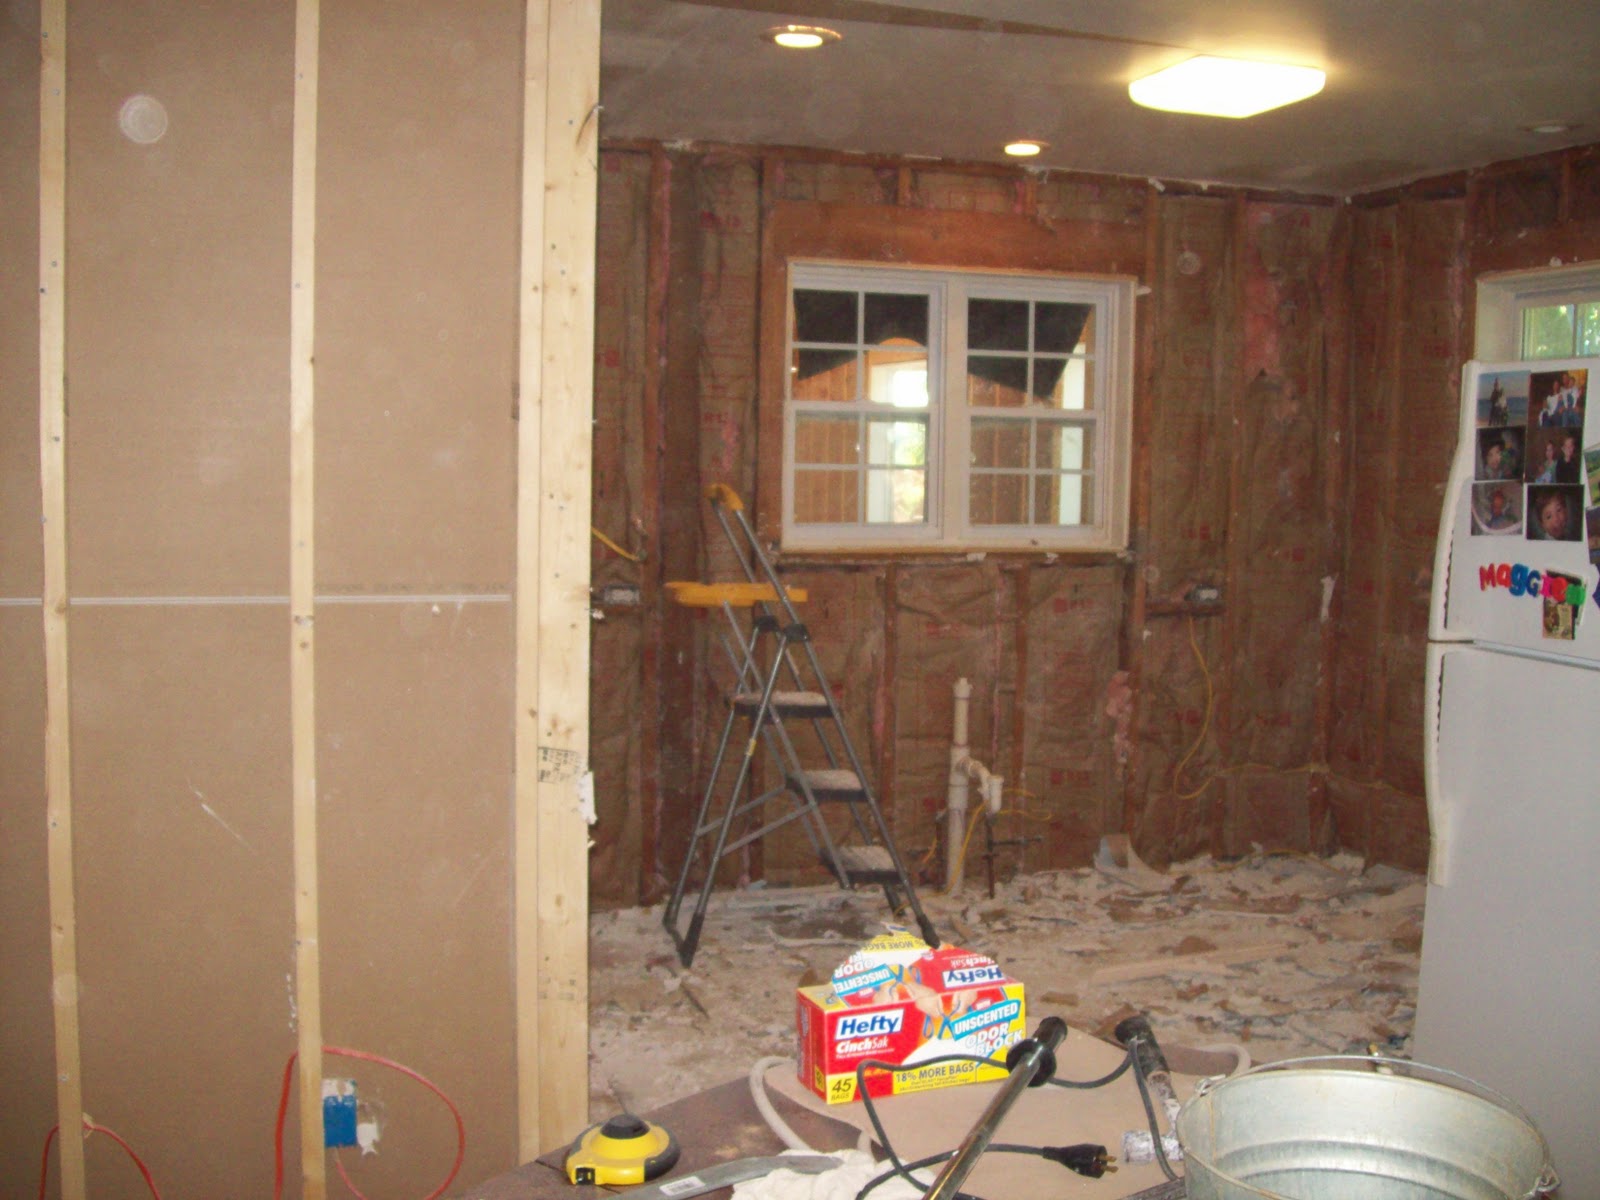
In the picture above, notice the window.  That window was previously a kitchen window that was removed and became the walk through between the kitchen and dining room.


First floor, front view

First floor, back view and what would become the garage

Garage, and not so straight camera

View of front of house


View from the back of  the house

Laying the rock work is what has taken much longer than I ever expected.  I had no clue what a slow process it is, but it is looking wonderful.  Our rock mason began working in mid-June and has worked 5 days a week every week since then and still has a few days before finishing the new addition.  We were so grateful to find matching rock at a quarry between us and Birmingham, but had no clue just how much rock it would take!  We have ordered over 50 tons of rock for the addition.

West side of the house, with smaller lawn mower garage door

The upstairs, beginning from the left in the above picture, is the game room, stairwell and then master bedroom, bath and nursery.  The downstairs has a new dining room on the front of the house, large laundry room with access to the basement, and a 2 car garage with a separate garage storage area for the lawn mower, tools, etc.

Front of house, again, during rock laying....Dining room with Game Room above


Front of previously existing house....new windows, new roof  and new front door;
still waiting for vinyl trim around roof line and two white columns on the porch


Front of house with addition on west side

Back of house....Nursery and Plain Jane's closet upstairs, with garage downstairs

Garage doors, just intsalled yesterday

The rock work on the new addition is almost complete, hopefully by the end of this week.  Then our rock mason will have to lay all of the window sills around the older part of the house and fill in where we removed some windows. 

In this "before" picture, notice the brown, concrete window ledges that lined every window.  These have all been removed and will be replaced with rock work, as seen in the picture below, to match the new part of the house.


In the next segment, we will move inside the house, which is what everyone really wants to see.